
Wrapping tutorial or “why is my simulation exploding?”#
Short answer: Good news! There is no cause for panic. Your simulation is not exploding.
Longer answer: We will help you understand the principles of how molecular dynamics simulations are performed and what “wrapping” is.
Periodic boundary conditions (PBC)#
Molecular dynamics simulations are highly computationally expensive. We are only able to simulate up to a few hundreds of thousands of atoms for relatively short durations up to a few seconds. The simulation time and computational requirements increase linearly with the number of atoms in our system. Thus we try to keep our systems small to speed up our simulations. However a small isolated system does not reflect the reality inside our cells where molecules are located in large amounts of solvent. Thus we use periodic boundary conditions to immitate a simulation in infinite space.
What does this mean?#
It means that when we calculate interactions between the atoms, we pretend that our simulation “box” has on every side of it a copy of itself and the copies have copies on their sides etc etc, thus creating an infinite space. These copies we call “periodic images” of our simulation box. In reality however we are only simulating a single box using “periodic boundary conditions”.
Example#
Consider this example. We have a simulation box with four water
molecules. 
When we calculate the interactions we pretend that we have copies of the system on each of the box sides like in the following. Of course we are not simulating those copies, that would be a huge waste of computational time. As you can see, all copies are identical to the central box.

box#
In MD we use cutoffs for non-bonded interactions which limits the distance an atom “sees”. Simplifying a bit the example by considering each water molecule as a single atom, if we imagine that the cutoff in our simulation is the orange circle, then the water molecules will interact with all other molecules inside their circle. As you can see, two of the water molecules interact over the box boundaries with each other. This allows us to pretend that we are simulating infinite solvent.

box3-2#
Storing of coordinates during a simulation#
As you can imagine, molecules can reach the borders of the simulation box. Once they do that we are left with two options:
Teleport them to the other side of the box
Let them continue moving outside of the box
The first approach, while more visually pleasant has two downsides. The one is that you cannot know the total drift of your atoms. The second is that if done carelessly it can cause precision issues in the calculations.
The second approach is generally preferred, where the atoms coordinates are not reset but interactions are always calculated as if they were located in the central simulation box.
So if you see your atoms “leaving” the simulation box, that does not mean that they are no longer interacting with the rest of the molecules in your system. They have just moved over to the next periodic image of the system.
Example#
Let’s consider a simulation of Villin in a water box. Due to how we construct the water box at the beginning, the molecule looks nicely centered within the waters.
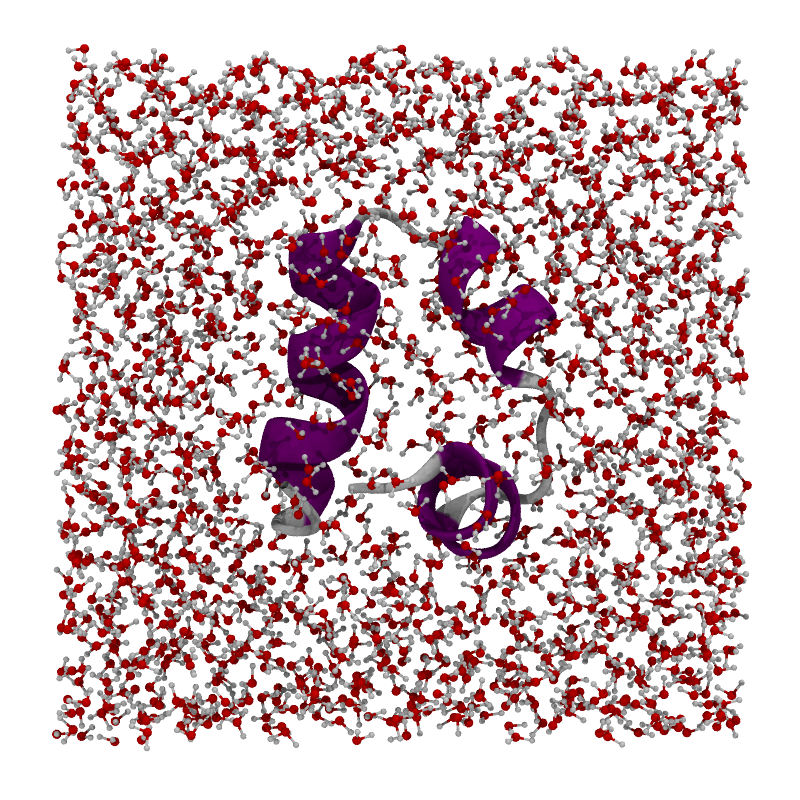
villin#
After simulating for a few steps this is what our simulation looks like. This is normal, as we have chosen the second approach which is to let molecules move out of the original box into periodic images.
steps#
In reality all atoms are still close to each other and interacting.
Indeed in some programs such as VMD you can visualize the periodic images in your representations. If we do that we will see the following which shows that indeed if we account for all periodic images, our system atoms are still interacting.
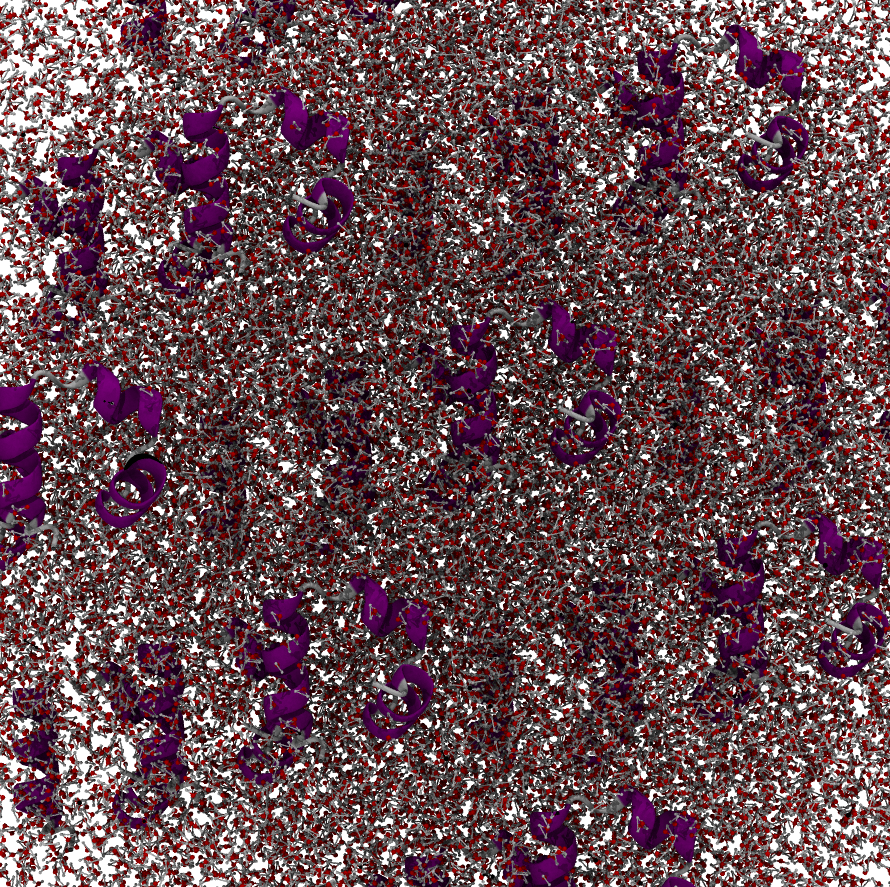
periodic#
This is however a bit confusing to interpret with so many copies of our system around. We’d rather have a single wrapped box of our simulation.
Wrapping#
Of course when we try to visualize our simulations we only see the real atoms, not the atoms we pretende existed when simulating the interactions. Thus if a molecule has moved onto another simulation box we will not be able to see anymore what interactions it is making with plain eye.
This is where wrapping comes in play. Wrapping is the term used for placing all the atoms back into a single simulation box. Since we know the size of our box and the absolute position of our atom, it’s trivial to move all atoms back to a single box (wrap them back).
How does wrapping work?#
While we do know the box size, one question remains for wrapping. What becomes now the center of our box? Unfortunately since our systems drift in space freely during a simulation it’s not practical to decide the center of our box in a single set of XYZ coordinates.
Thus when wrapping we tend to define the center of the box either by the coordinates of a single atom which we choose as our center or as the average coordinates of a set of atoms.
How to select the ideal wrapping center?#
This can depend on the system that you are simulating as well as your personal taste.
For example if our simulation consists of a single protein, we probably want to wrap the simulation so that the protein is in the center of the box. Thus we would choose the average coordinate of the protein as the wrapping center.
center#
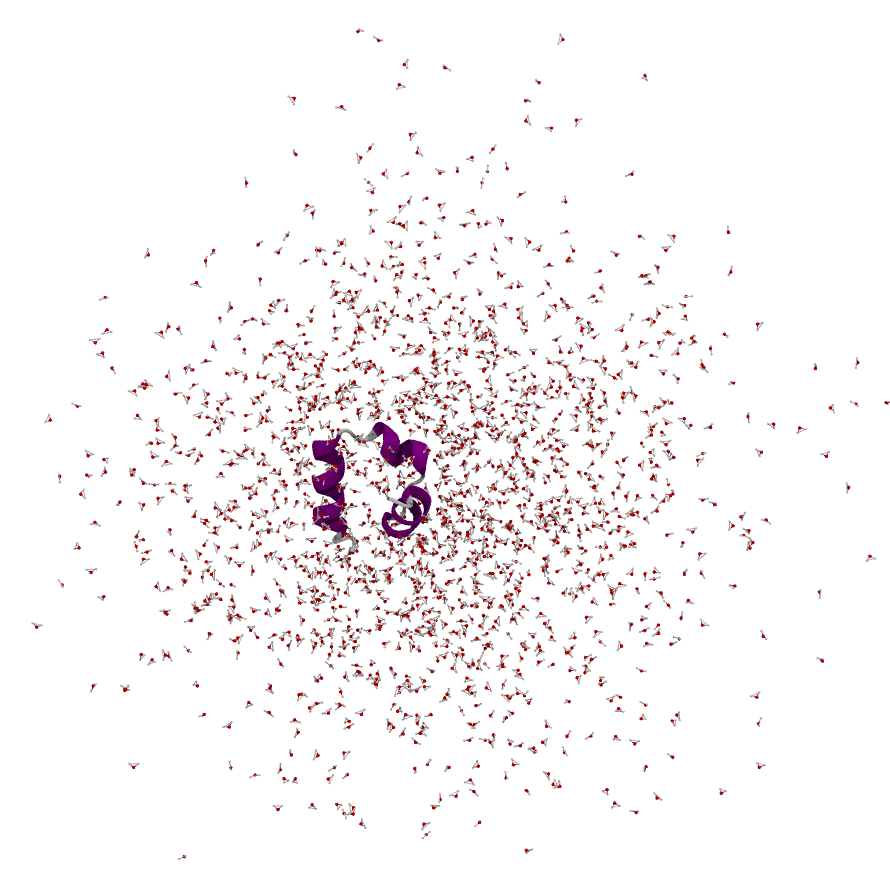
Now our water is wrapped back nicely around our Villin protein.
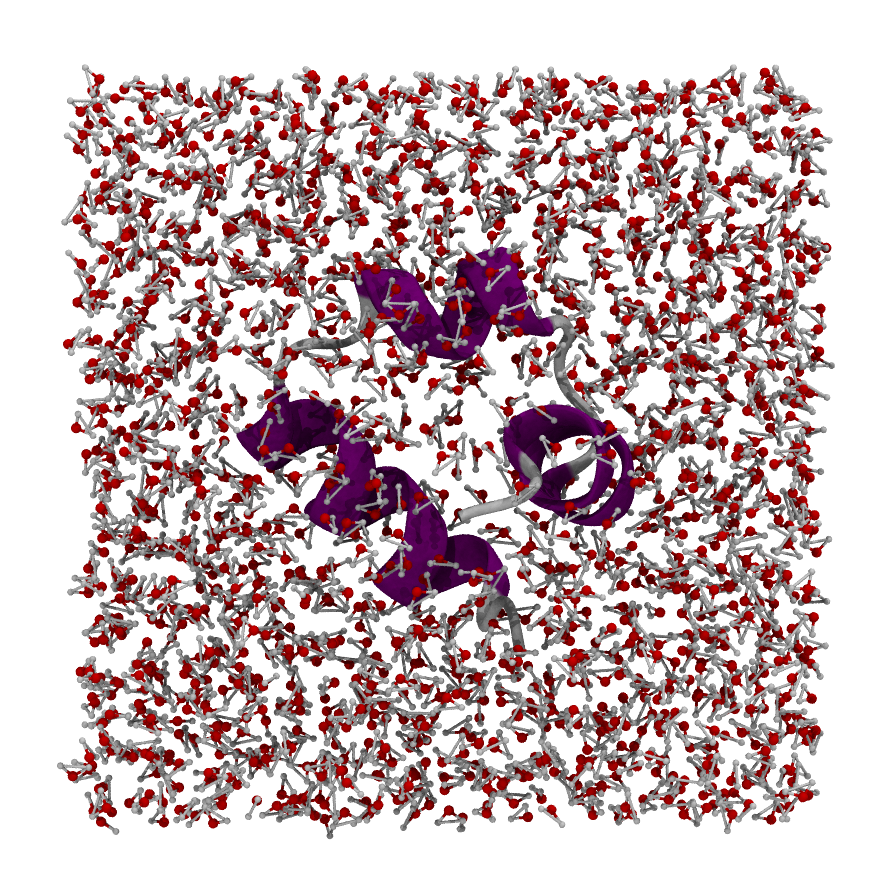
This is of course a very intuitive case. We could still mess it up though if we wrapped for example around the highlighted water residue instead of the average protein coordinates.
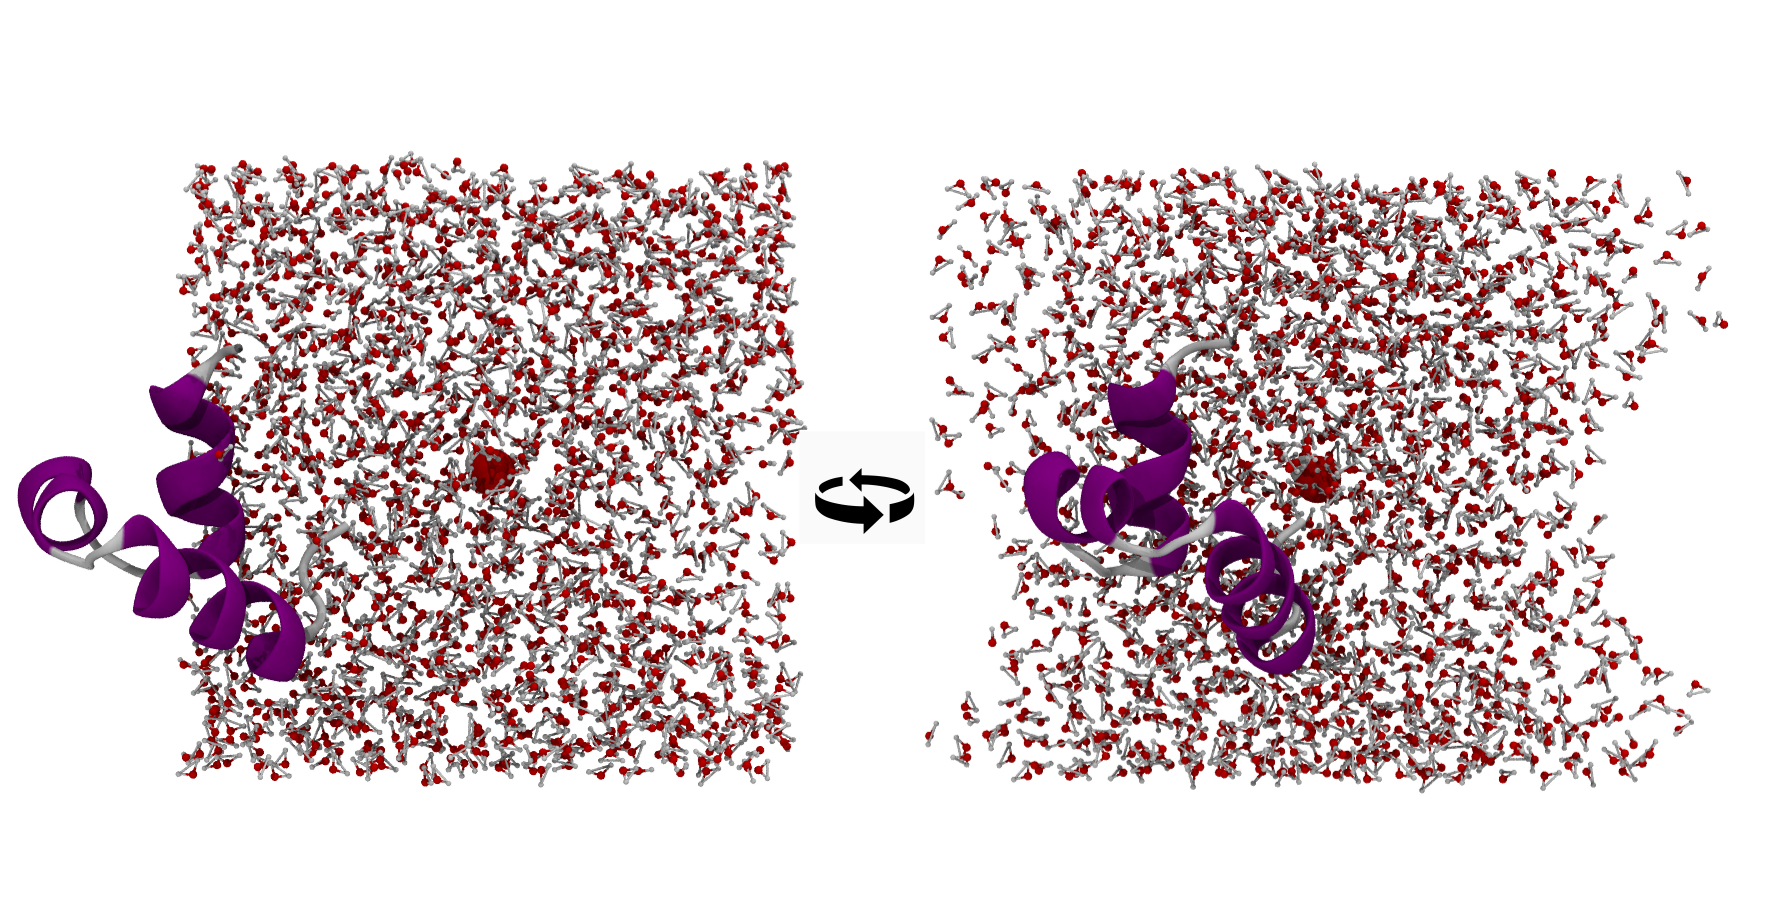
vacuum#
As you can see now our protein looks like it sticks out of one side of the box and if we rotate it around we can see “vacuum” on the other sides of the box. Of course this is just an artifact of wrapping, there is no vacuum there, instead the part of the protein which sticks out on the left actually occupies that space on the other sides of the box. However we have decided to keep bonded molecules intact instead of breaking them apart when wrapping for aesthetical reasons which is why this occurs.
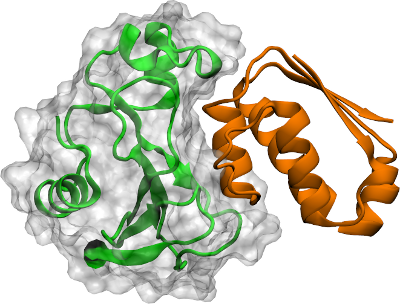
If our simulation consists of two molecules, i.e. two proteins, we need to decide if we want to center the box on one of them or if we want to center the box on the average of both proteins. Typically you would choose the first option since the average of both proteins will vary strongly during the simulation. In the bellow case the proteins are in contact so we can wrap on the average coordinates of both but if our simulation has unbinding events, wrapping on the average of both could create an ugly visualization and we might need to select one or the other as the center of our wrapping.
twoproteins#
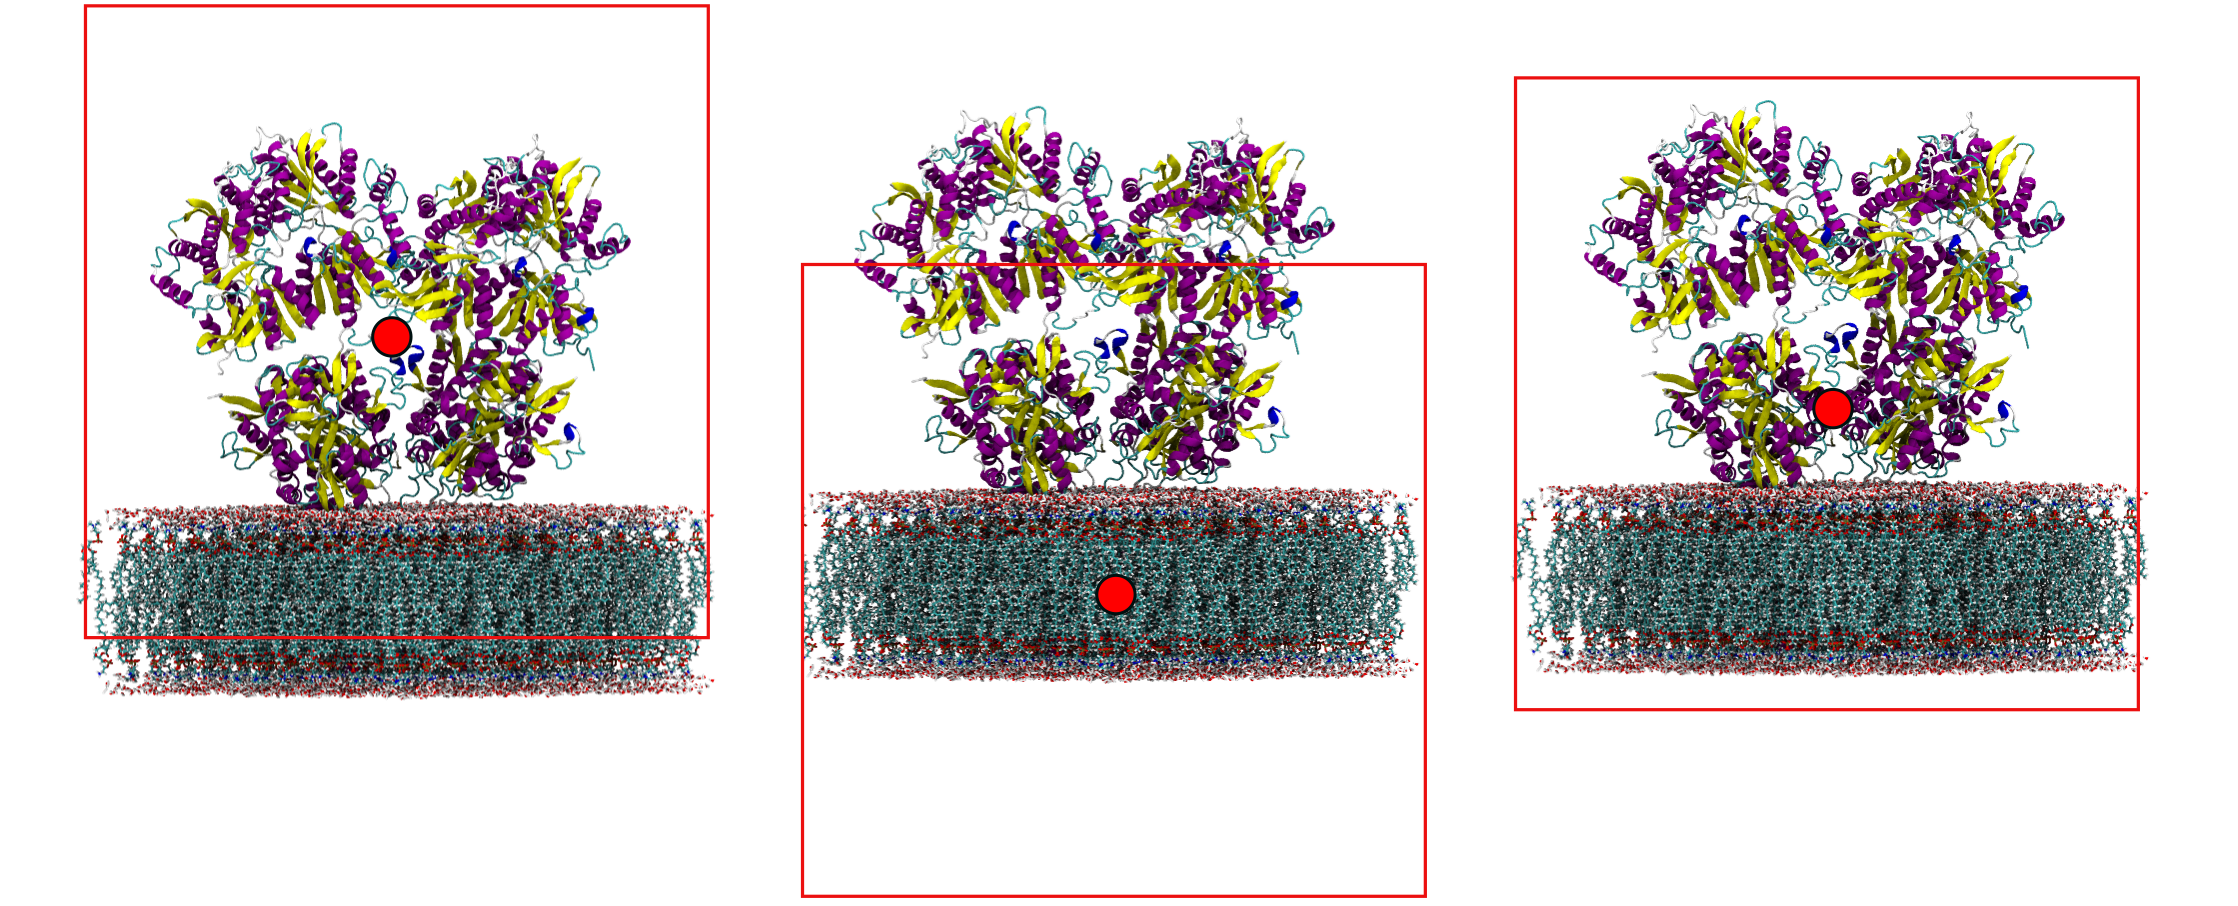
If our simulation consists of a protein and a membrane, depending on what we are interested we might want to wrap around either or both. Take care however, you need to wisely choose the center of wrapping if you want both to be seen whole in your wrapped box.
In the first image we centered on the protein. Now our membrane will be wrapped to the top of the box! In the second image we centered on the membrane. Now our protein might be wrapped to the bottom of the box! In the third image we centered on a residue half-way between the protein and the membrane which will allow us to get a perfect wrapping.
membrane#
How do I wrap?#
You can use various programs for wrapping your simulations. In our case
we suggest using the python
moleculekit
library which Acellera has developed. Wrapping can then be performed in
four easy steps. Install moleculekit if you still don’t have it
installed, open an ipython console and enter the following commands
adjusting the paths to where your respective files are located.
from moleculekit.molecule import Molecule

mol = Molecule("./structure.prmtop")  # Can also read PSF topology files
mol.read("./output.xtc")              # Can also read DCD trajectories
mol.wrap("protein")                   # Wrap the box around the average protein coordinates
mol.write("./output_wrapped.xtc")     # Writes out the wrapped simulation to a new XTC file
Of course you might not get it right on the first try. If your system is more complex than a single protein in solvent you might need to find which exact molecule or residue to wrap your box around. For that you can visualize your simulation in your favorite viewer and look around to find which residue would make the ideal wrapping center.
mol.view()                       # Visualize the system in your viewer
mol.wrap("resid 15 and chain A") # For example I want to wrap around residue 15 of chain A
mol.write("./output_wrapped.xtc")
This summarizes most aspects of MD simulation wrapping and we hope this tutorial has been of help to you. As you now know, wrapping only affects the visual aspect of the simulation and is no indication of a broken or exploding simulation. There are many choices on how best to wrap your protein and we hope that you will find the ideal one for you.